This is an original article written by Jon Berbaum, President of Highland Solutions.
Journey maps are very popular tools at the moment, and with good reason. They’re a simple, fast, and effective way to help a team understand the experiences that customers are having with an organization from the customers’ point of view.
However, like many “simple” things, doing a mapping exercise well can be quite a bit more complicated than it first appears. Journey maps are actually a category of tools, not a single exercise.
Dive deeper: Highland’s Creative Director Jeff Blanchard has done some excellent work with his Map of Maps project to explain the different goals that various map-like tools can help their users achieve.
Once you get on board with the basic idea — “Let’s map our customer experience to understand the current state and design a better one” — there can be a bewildering amount of vagueness about what to do next.
There are some beautiful examples of map artifacts online, but how do teams get there? And with journey maps approaching “trendy” status, the state of practice is all over the board, with a lot of bad or half-baked efforts adding noise alongside the work of skilled practitioners.
If you’re willing to really dig into a book to get started, you should read Jim Kalbach’s Mapping Experiences. But before you do that (or instead of, if you are so inclined), the Highland team has helped a lot of our clients create their first journey map. Here is our outline of the process we lead them through, and our advice to others getting started with journey mapping.
Before You Begin: Pick Your Team
We find the right mapping team size is six to eight people. Yes, that is a narrow range.
This should include two researchers who will be doing the interviews and facilitating the mapping, plus key participants from across your organization. If you’re under six you probably don’t have broad enough interest to justify the activity, and if you’re over eight the group dynamics start to get bogged down. We’ve gone as high as ten people, but that is challenging even for professional facilitators, so grow at your own risk.
If you don’t have an Executive Director or COO or some other leader keenly interested in understanding and improving the journey you’re mapping, you should question if you’re actually ready to go.
Day 1: Charting the Course
Start with a half day or full day session with the mapping team focused on getting everyone pointed in the same direction. There are four key activities for this session.
1. State your design goal or challenge
Clearly answer the question: “What is driving our organization to do this?”
Here are some recent questions we answered using journey maps:
- For Make-A-Wish Illinois: How might we create Wish Journeys that produce resiliency and agency in children and their families?
- For a children’s hospital: How might we create holistic ER visit journeys that provide appropriate physical and emotional care for children and parents?
- For a financial services firm: How might we assist younger consumers in their early experiences with money?
Some of these design challenges are more exploratory and some are very specific. The journeys listed above represent:
- An end-to-end customer journey with Make-A-Wish,
- A journey through one specific part of the children’s hospital’s services, and
- A whole “season of life” experience beyond the boundaries of interaction with the financial services firm.
2. Pick the map’s point of view
What is the starting point, ending point, and boundaries of the journey you are mapping? The better you can articulate whose experience you are mapping and when that experience begins and ends, the more impactful your mapping exercise will be. Spend time getting this nailed down.

3. Create a persona or personas of the people who will be in your map
Some maps have only one persona, which is totally fine (and usually preferred). Our rule of thumb is 7 to 10 interviews per persona in the map, so adding personas will increase the interview and mapping effort in a directly linear way. If this is your first map, I’d recommend forcing yourself to narrow down to a single persona with a tightly defined beginning and end.
A word of warning: It is tempting to not pick a tightly defined persona here because you want to cast your net widely to learn as much as possible. However, if the people you interview (and, thus, the journey you map) are not fairly similar, you could find meaningful divergence in experiences when you are mapping. This makes the map — which is already somewhat complex with granular experience data — feel completely overwhelming, even to the point of meaninglessness, as the team can no longer grasp and order the patterns in the map.
It is relatively easy to pick another persona, do 7 to 10 more interviews, and lay that over the existing map to look for differences. It is really hard to make an initial map without a tightly defined persona and point of view.
4. Hypothesize which stages are on the journey
Make an “inside out” guess at the stages of the journey you are preparing to map.
Your team of 6 to 8 people should include team members who know the journey you are mapping really well from the organization's point of view. So get some big stickies and create a list of the “stages” of the journey as they understand it. Give each stage a name, stick them on the wall from start to finish, and get an agreement in the room that these stages accurately describe the journey. These are not your final journey map stages (those will come from your interviews), but they help everyone get oriented to what you think is true of the journey at a high level.
Phew, day one in the books. It goes faster after this!
Week 1: Preparing to Interview
The rest of Week 1 you’ll be doing three things:
1. Create a field guide
A field guide is, in its simplest form, a list of interview questions. These are questions your team believes can help participants narrate their experiences that are of particular interest to the journey you are mapping.
As you prepare, remember you are looking to uncover experiences, not opinions. This means your first question should be something like:
“Tell me about the first time you ever heard of [our organization]”
or
“Tell me when you first realized you needed [the thing] that [our organization] provides.”
And every question after that should be for the purpose of helping the person remember and recount their experience. Try to get them to narrate a documentary about their experience. Then dig in to look for the specific emotions, thoughts, and actions along the way, with particular attention to places where it seems like something is not going well.
Do not ask for their opinion or advice about how things went or what you could have done better. Stay laser focused on their retelling of the actual experience as it was.
Dive deeper: Highland’s CX Consultant Charissa Morgan shared tips on a JTBD interviewing technique that we’ve found helpful in unlocking key moments from journeys that occur over a long period of time.
2. Schedule interviews
Pick interviewees that match your persona, and work on scheduling interviews with them. Local, face to face interviews are VERY strongly suggested.
This part is definitely the least fun. If you’re not using existing customers for the map you picked, you may want to use a sourcing agency. If you’re doing it yourself, use something like Calendly to make scheduling a bit easier. You’ll typically need 45 to 60 minutes for an interview, and you’ll want to provide a thank you gift of some kind to your participants. Gift cards are de jour, but more specific or thoughtful gifts are always good.
Sourcing and scheduling always takes more time than teams anticipate, so even though four days seems like plenty of time to get interview prep done, you’ll need to focus here to get your interviews in place.
3. Make a data packet
Identify any other data your organization already has that may be relevant to the map. Many organizations have survey feedback data (quantitative and qualitative), usage/repeat buyer data, and other information that can be valuable in supplementing the interviews for the map. Use the time when you aren’t sourcing and scheduling to identify this information, curate it, and prepare a “packet” to be distributed to the team before mapping.
Week 2: Interviews & Coding
We typically leave a week of elapsed time for interviews. Some tips for successful interviewing:
- Three interviews a day is the most we would recommend, including time for coding. If you’re traveling to meet your interviewees, it typically ends up being two interviews per day.
- Interview in pairs, with one person asking the questions and the other taking notes.
- Ask for permission to record the interview and do so.
- Immediately after the interview, both interviewers should work together to code the interview into the thoughts, feelings, actions, etc. that compose a journey map.
Dive deeper: We use a very simple template in Google Sheets to code our customer journey interviews.
At the end of Week 2, you should distribute all of the data you have collected to the full mapping team. This means the data packet curated in Week 1, the coded interviews created in Week 2, and — as optional for those who are interested — the recorded interviews themselves. Ask your team to spend at least half a day reading through all of the interviews and data before you meet to map. Everyone must be familiar with the data before the mapping session.
I hate to even admit this, but I once let a client convince us to lead them through a journey map without doing interviews, just to let their team see the exercise. The end result is that their team accurately saw journey mapping as pointless, which is exactly what it is without interviews. So, don’t be dumb like me: never skip interviews.
Week 3: Map!
The first three days of this week are simply for the team to have time to read and absorb all the data, and for you to collect all of the color-coded sticky notes you need to fill a wall with the incredible map you are about to produce. The last two days are for making the map and responding to it.
1. Make the map
Mapping is actually really simple if you’ve done all of the prep work well. Plan for six hours together, with a healthy break for lunch. Normal good facilitation skills apply here:
- No devices in the room
- Regular breaks
- Good snacks/low carbs
- Get people out of their seats to keep the energy up
Start by naming the first stage in the shared journeys narrated across the interviews. Use a really big sticky and put it up high on the wall. Then, underneath it, fill in that stage with Actions first, then Thoughts and Feelings, then finally Touchpoints and Channels. We call these the CX Building Blocks, and define them using the questions below:
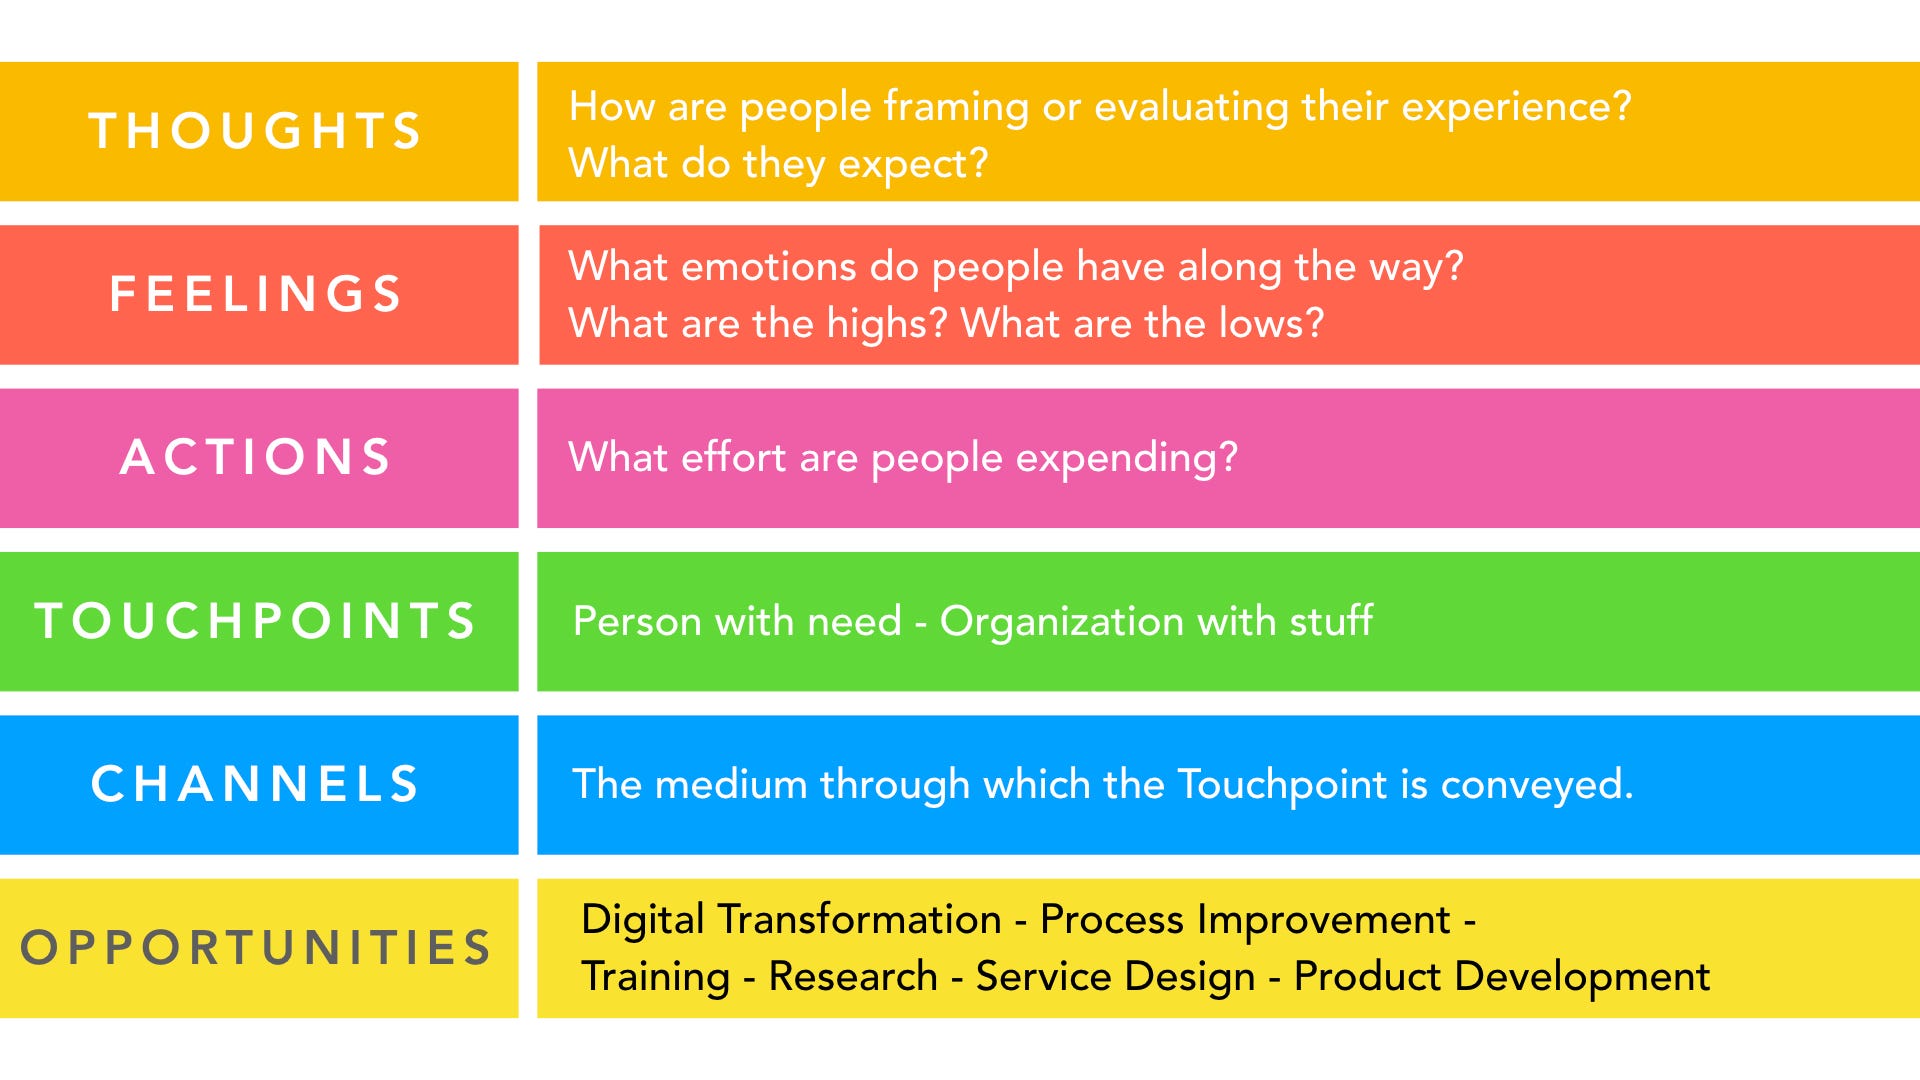
Typically we print out a poster-sized version of the image above and put it up in the room while we’re journey mapping.
Each Building Block should have a specific color of sticky, which will run in a horizontal row across the wall through each stage. Then repeat with the second stage. This process isn’t fully linear, and you’ll find yourself skipping ahead and doubling back a bit as the map emerges and insights come out.
As a facilitator, you’ll need to get a feel for when enough is enough in each stage. Some stages are naturally more dense than others, so don’t feel pressure to make them all look equal. And have the courage to say “no” to a suggested sticky if it is duplicative or not clearly indicated in the interviews. You’ll end up with a lot on the wall regardless.
When you’re done, you should have something like this:
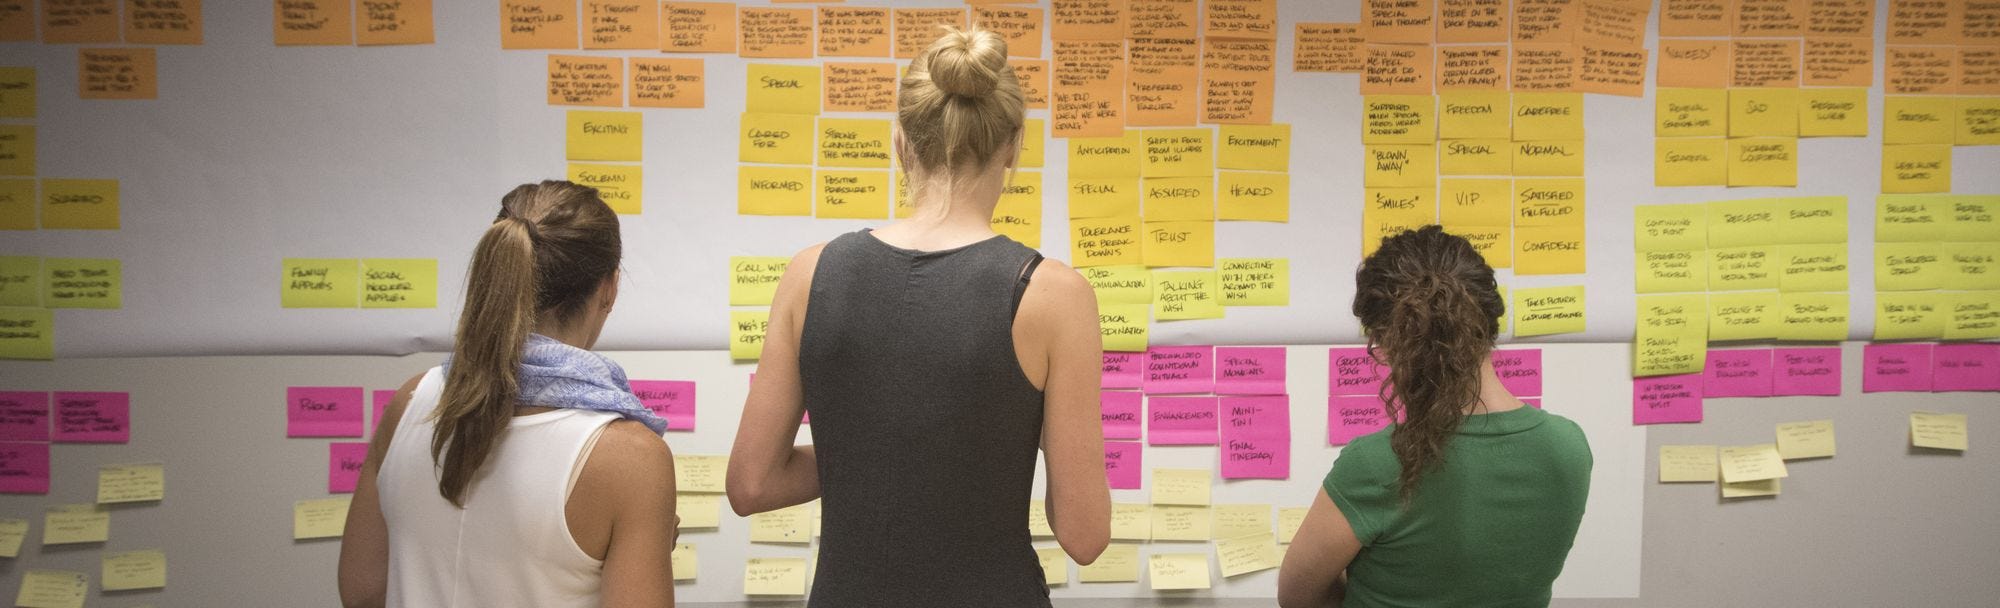
Make-A-Wish Illinois examines their customer journey map — read the full case study | Photo by Jeff Blanchard
2. Identify opportunities
This requires 3–6 hours together, on the very next day after you make the map together.
You are going to “mine” the map for opportunities. It is important to keep this on a separate day, both to get new energy into the room and to be sure the mapping day doesn’t veer too quickly into trying to come up with solutions.
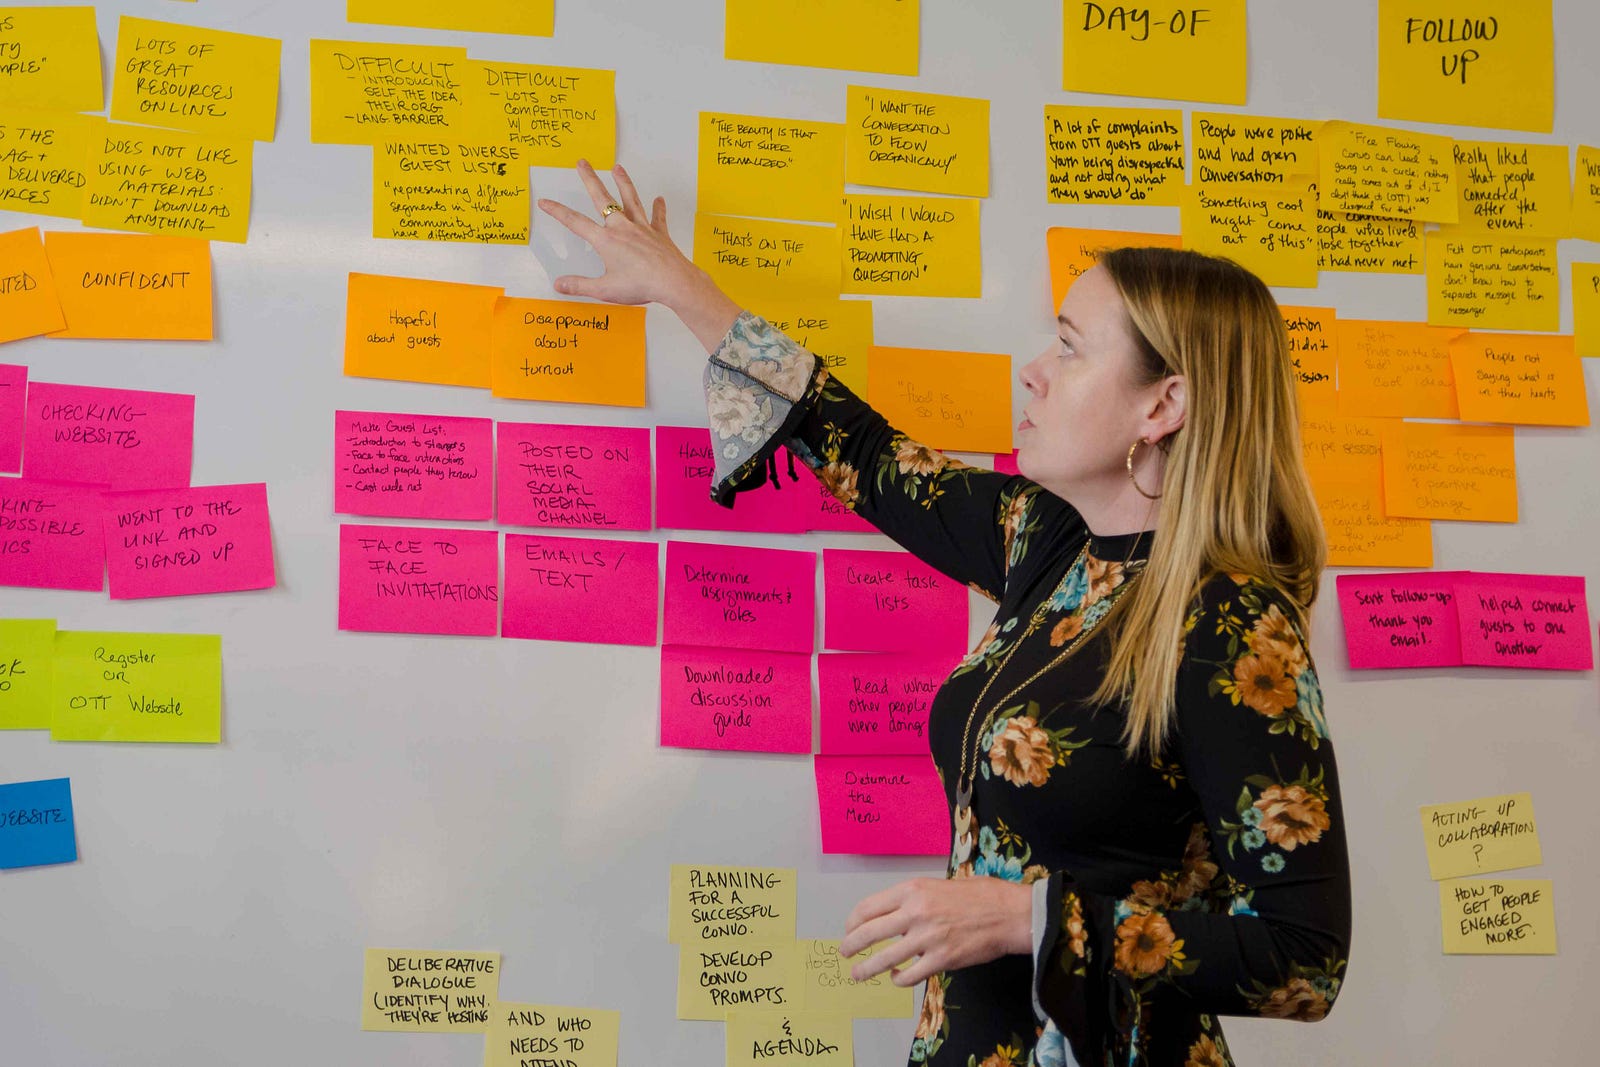
We find mining for opportunities works best as an “alone together” exercise, where the team gets 15 minutes to peruse the map silently, each person making notes to themselves, and another 15 minutes to write down the clearest opportunities they see in the journey.
Then the team takes turns, each person going up to the map to present their stickies, briefly explain each opportunity, and stick it on the wall in the appropriate stage. Similar and identical opportunities can be grouped together for clarity.
After this, go through some kind of ranking exercise for the opportunities. We like to use a simple feasibility and impact scale, so the lowest effort/highest reward opportunities float to the top, but any sort of ranking activity will work. If there are lots of opportunities, it can help to use a straw poll (each member gets ~8 little stickers to put on the opportunities they want to vote for) in order to narrow down to a workable number for ranking.
Finally, pick the top three to four opportunities and create a simple plan for each one on what you might do to learn and execute against that opportunity to improve or transform the journey. Each team approaches this step differently, and whatever is typical for your organization can work.
The Map Artifact
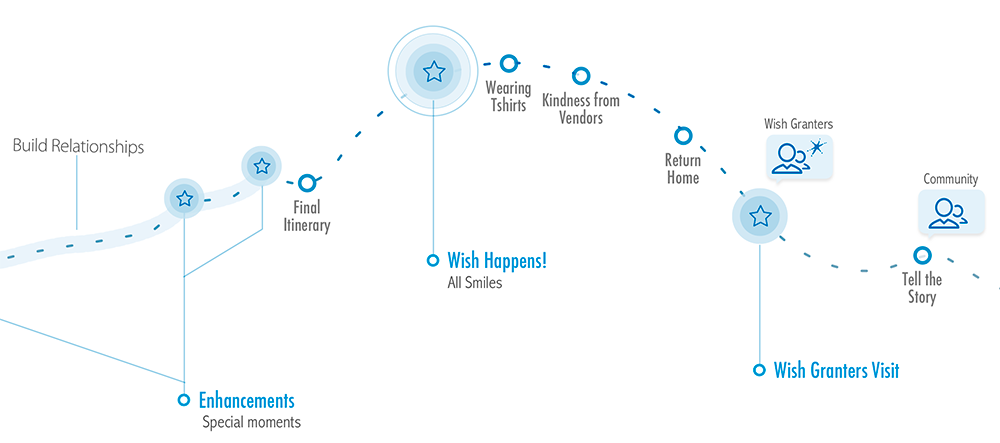 Sample from the final Make-A-Wish Illinois journey map — read the full case study
And that’s it! Three weeks to your first map. Now you can repeat with a different point of view or persona, and execute on the insights and opportunities this map generated. Happy mapping!
Highland Solutions is an IMEC Third Party Resource partner. To learn more about Journey Mapping or Design Thinking, contact IMEC at imec@info.org or call us at 888.806.4632